EASY CRAFTS TO MAKE AND SELL

I’m going to share a post today about some of the crafts that I most frequently make to sell.  After making them, I sell them in my craft booth, Booth #555 at the Morehead Peddlers Mall.

And here is just a few that are super easy and fun!

Snowman Clothespin Magnets:
These adorable snowmen magnets are a super fun craft.  They cost only a few dollars to make a package of 50.  And as you see I price these for $1.00 each in my booth.  You can also use them as bag clips for potato chips and such.

Click Here for the full instruction list to make these.

Snowman & Pumpkin Wooden Spoons:

These are super fun and easy to make also.  And on the cheap side but you can sell them for around $2.00 and still make a profit locally.  If selling online I know you have to raise it to cover various costs.  But local sales and craft booths these can be huge money makers.  Just keep enough in stock and ready to go.

CLICK HERE for full instructions.

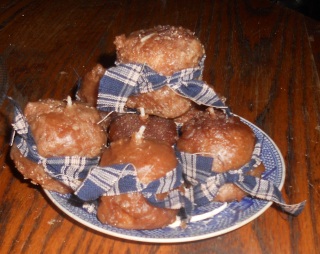
GRUNGY & GRUBBY TEA LIGHTS:

These are a messy craft but fun! Who doesn’t love having primitive looking candles sitting around? I think they look so country, I just love them!
You can grab the plain, white candles at your local Big Lots store for cheap!

CLICK HERE for detailed instructions.

AND BATTERY OPERATED ONES AS WELL!:

And finally, one of my all time favorite crafts,
PRIMITIVE “KITCHEN THEMED” WOODEN SPOONS:

These are super fun and look adorable in any country kitchen. I have crocks and jars full of these in my home. And I’m adding to them every time I make a batch!

CLICK HERE for detailed instructions.

Primitive Snowman Spoon Magnets

Been a  little bit since my last post. Sorry ya’ll! But the Peddlers Mall has kept me pretty busy lately with the holidays coming up so fast.  My hand made crafts are already selling out! I couldn’t be more happier!  Just knowing that people really like the little things I make is an awesome feeling!

Here is the latest little snowman crafts I have made.  Snowman wooden spoon magnets. I priced these little primitive cuties for only .99 cents each so that it will be a cheap gift for anyone to pickup.

These started out as little wooden spoons that I had won off from an eBay auction.  I got a pack of like 48 or so for $7.00, since it was an open package. Great deal! Still plenty enough for me to use.

They are approximately 3 5/8″ tall so they will make for some cute little snowman magnets! Not sure where these were bought from originally but I’d guess WalMart has some similiar.

First, I laid them all out on some wax paper so that my counters will stay somewhat clean.  Then I gave them a quick coat of off white craft paint.  (If it had been warmer outside, I would have simply spray painted them but it was like 20* outside!)

Just dab on a glob of orange and pull your paintbrush straight down. That’s it for the noses! Simple.

And above you can see that I used some dark orange to paint on little skinny noses. These are popular on the primitive themed snowmen.

And next I free handed on some little cute faces.

Just use your imagination when painting on the faces. Give each a different look by simply doing the eyebrows differently or the mouths.

I like the little X’s for mouths for some reason, lol.

Next, I tied on little bits of pieces of homespun fabric in all different colors to make these little snowmen a scarf.  I had bunches of these leftover from various other crafts and I always save the little scraps for things like this.

And then it was time to add the little magnet on the back.  I got this package of 20 magnets at the local Dollar Mart for only $1.00 called Magnetic Buttons.  Sadly last month that store closed though.

20 magnetic buttons for only $1.00 from the Dollar Mart.

These are small but strong enough to hold up these little wooden spoon snowman magnets.

Here you can see instead of all having black buttons of coal down the body, I wrote a few words such as “love and friends.”  It just adds a bit more cuteness I think and gives each it’s own personality.
Look close and you can see the little strips of homespun fabric as scarfs.  I just tied a simple knot in them around the neck area.

As you see above, I stuck them in an old white enamel pan for display.  These pans make them look cute and are an easy magnetic board to stick them to for displaying.

I was going to add little jingle bells to the scarves but I couldn’t find any in my craft supplies small enough.

So here you have it, my Snowman Wooden Spoon Magnets made out of plain wooden sticks, similar to ice cream spoons, for only $ .99 in my Peddlers Mall Booth #555.

You may also like my previous post:

SNOWMAN MAGNETS from FREE Paint Stir Sticks : Primitive Snowmen

Primitive Wooden Spoon Magnets

I recently posted about how to make primitive, wooden spoons here: PRIMITIVE WOODEN SPOONS with step by step detail. It was a great project! And got lots of interest from many of you.

I have since revisited this idea and turned the crafting up just a notch by making them more interesting.

Here’s how I did it:

I started off with plain, simple wood spoons found at Walmart in packs of 4 for around a dollar in the kitchen supply section.

I use a few of the same photos from previous posts when it is plain wood spoons so I don’t have to take them for each craft post. lol. Just in case you are tired of seeing this same pic I use in my spoon posts.

Very cheap!

I bout about 10 packs of these. And then I paint them in a variety of colors. Here’s a group of mine being painted in ivory white. I used spray paint this time because it was faster.

Just mix and match sizes and paint them in groups. Let dry for a few hours. Don’t forget to paint the backs!

Sometimes though, for certain colors, you will need to hand paint on some craft paint for the base coats. This takes more time, but you have many great colors to choose from. I tend to stick to basic black, navy blue, wine red, okra yellow and sage green as base colors.

And then after you have a ton of all these colors ready, you’re set for the next step.

You will need to paint over them with a second coat in another totally different color. Yes, I know sounds like a lot of work, but trust me, IT IS WORTH IT. It makes them look so much better.

And after that second coat, you will be ready to start some light to medium sanding. I use a light sand paper, nothing real heavy.

LOOK CLOSE at the REDish color one in the middle. Do you see how the black is the second coat? See when I took sandpaper and brushed off some of the second coat, it allowed the red underneath to show. And it makes it look older. I love it!

When I ran out of black spray paint, I brushed on some of that in the can too. I was worried it wouldn’t sand off easy, but it did.

And after the sanding, I was ready to start hand painting some detail. I just looked around in magazines and online clipart for ideas in the primitive them and free handed them below.

Some I did a willow tree on, and old crow that I tried to paint, sitting on a crock. A simple bowl with a star and a window scene with shutters. And oh, a cute plate sitting on a shelf with a star in it. These took some time, about an hour to just do this part and lots of patience.

And then I was ready to add the magnet. I got the round ones from Walmart craft section cause they are stronger to hold notes and papers.

Just simply hot glue them on. The hold is super strong! And it dries fast!

And here’s some that I have all finished and in my Peddlers Mall Booth #555:

I priced these for $2.49 each. I’m not sure if that is good or bad because I have none to compare them to. So far, I’m the only one that has made them in my area for sale. With such a strong magnet, I think it is worth it.

What do you think?

——————————————–

Note: In case you don’t want to do magnets on these: For the previous Primitive Style Wooden Spoons that I made and didn’t turn into magnets, I grouped them in groups of 3 for sale, like this:


Primitive Style Wooden Spoons

I am in love with making primitive themed wooden spoons!

 And this here is about my fourth batch of them so far. I’m addicted! lol. They have been really steady sellers at my Booth #555 at the Morehead Peddlers Mall. I’ve been bundling them in groups of 3 and pricing them for only $2.95. I do have more detailed ones that I’ve turned into magnets for sale as well, for $1.99 each.

I start out with the plain ole’ wooden ones you find at WalMart for a pack of 4 for $ .88.

I lay them out on some chicken wire (best ever thing to spray paint on!) with the sides bent just enough to keep the spoons off the ground. Spray them a base color of whatever I have on hand. I like black, dark red and yellow as base colors.

Then after spraying both sides, I let them dry a few good hours. Then I bring them all in and do another color with craft paint. Whichever color you want. As you see from my finished pics, I make a wide variety of primitive colors. And the reason I spray paint a first, base coat, is so that when I do my finish sanding, the base color kind of seeps through and makes them appear a bit older. Kind of rugged looking or aged.

And here’s some more I’ve just finished up today. These say various kitchen words like, coffee, sugar, flour ect.

And some black and off white ones with the theme of eggs, checkerboard and stars:

And some reddish brown colored ones that say Old Crow and have the star and checkerboard on them.

And some more various colored ones in cinnamon, yellow and colonial green:

Those old crow hang tags are some I also made by using a simple stencil purchased from eBay.

I hope I’ve given you a crafting bug for those plain old wooden spoons you probably have already laying around! I have to go get some more done, because I am restocking my shelves tomorrow at the Morehead Peddlers Mall.

And if you’d like to see more, here’s the link to my other Primitive “Kitchen” Themed Wooden Spoons

And here’s my holiday themed wooden spoons in Snowmen
 
and Ghosts:
 

Happy Crafting!

Primitive Wooden Spoons

A country must in my prim themed kitchen is old time colored prim wooden spoons.

Instead of going out and buying some premade, I thought I’d try to make’em. After all I had plenty of plain wooden spoons laying around after making the Snowmen Wooden Spoons.

Here’s a pic of a few of my finished prim spoons:

If you notice, I try to stay with old timey colors such as reds, greens, grays and blacks. I just like them better. I wanted to throw in a mustard colored one, but have ran out of that color.

If you want to make these, here’s how I did it. I started with some plain wooden spoons from Walmart. I choose the cheap pack of like 6 or 8 for $1.50. Can’t remember exactly, but it was cheap. They looked like this:

First off, I took them outside and lightly spray painted them, both sides, black in the Rustoleum brand.

 I also tried to hand paint a few, to see which ones I liked better, with flat black craft paint:

The color was nice and strong, but it took forever doing so by hand. Keep in mind, I bought about 10 packages of these spoons to make, so that I could also sell some in my Peddlers Mall Booth. So I’m sticking with the spray painting!

Then I brought them inside and grubbied them up an extra bit while adding some color at the same time, like so:

by mixing the preferred color (at this time it was actually another flat black but I had a pic of the burnt umber) I mix them about 50/50 and apply kinda sparse. You don’t wanna fully cover up your first coat of spray paint. You want to let it kinda show through. (I wish I’d snapped a pic of another color spoon below other than black to show what I’m talking about, but I’m sure you get the idea.) You just wanna kinda give it a paint on paint look. Not just one solid color.

Then I take some heavy grit sand paper and scuff up all the sides and inner rims, and down the handle a bit like so:

And then I went back and added a piece of jute string to some of the handles. Just to make a lil more country look.

I’ve been mixing the colors and saleing them as a set of 4 for $4.95 in my Peddlers Mall Booth. They’d be great as a display in an old mason jar in your kitchen. I may be making some Christmas ornaments out of these in an upcoming post. So I better get going and start drilling some hanging holes. Don’t forget to check back soon to see them!

And you can check out current items in my booth by visiting facebook, Booth #555


Happy Crafting!
 

Blog Stats

  • 23,760 views